Northern Wilderness Dungeon Walkthrough

Dungeon Activation |
||
| <> |
To activate access to the dungeon, just follow the instructions below. It is
recommended that you do all the steps in the one go. It has been reported by some people that left the Northern Wilderness
area midway through, and found they could not complete the sequence when they came back, resulting in losing access to the
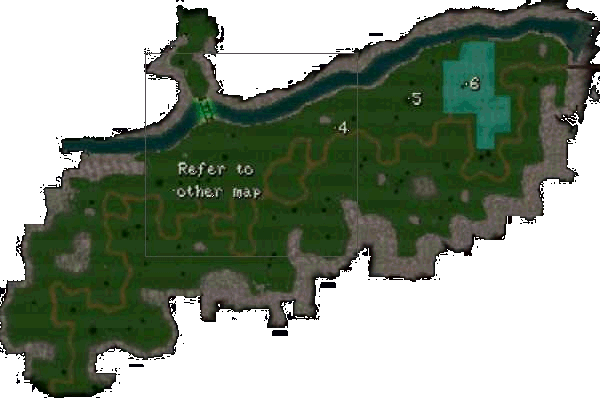
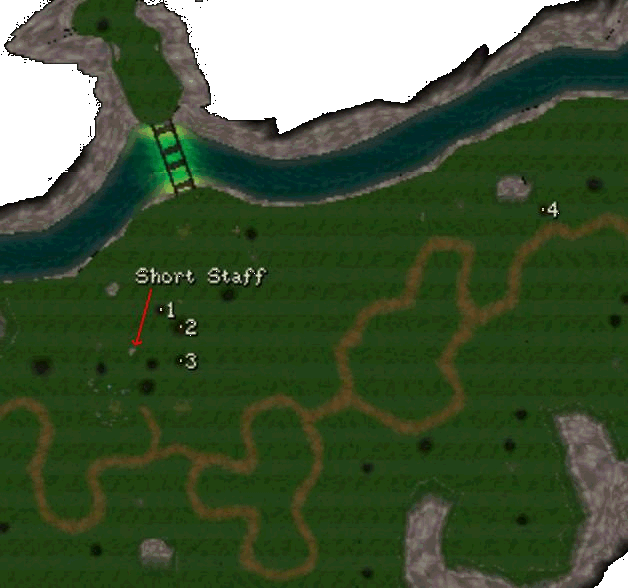
dungeon for that game (or having to load a previous save game). 1. Click all six runes located on trees in the positions shown on the diagrams below
 
|
Dungeon Walkthrough |
||
The following walkthrough has been written to visit all areas of the dungeon, you can
skip parts or run for the nearest exit if need be. Once activated, a party can visit the dungeon as often as wanted.
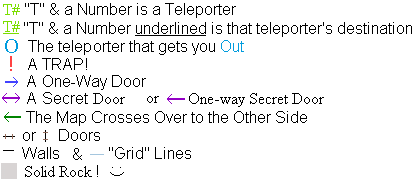
The map shown below was drawn by Moni (corrections made by Wolfie).   The party arrives in the dungeon at T4, facing west. Go one (1) square forward, face north and proceed three (3) squares, before turning to the west again. The party is likely to attacked by a Coal Golem at some point here. Two (2) squares west will bring the party to a door on the southern wall. Go through to door and step into the mushroom ring (T1) in the south-west corner of the room. The party will arrive at T1 facing east and be set upon by 4x Cavern Spiders. There is a Shadow Cloak, Bronze Greaves and a Scroll of Heal All hidden here. Exit out the only door of the room on the northern wall, turn west and go forward three (3) squares where there is another door on the southern wall. Face south and enter the room, a Gibbering Head is there to greet you. Once dispatched, step into the mushroom ring (T2) in the south-east corner. This will take the party to T2 and be facing west. Another Coal Golem is there, and a Book of Haste to be collected. (If you want to know more about how spellcasters learn spells, either though using spellbooks like this one or with spell picks during a level up, refer to this link for all the info). Head out the door on the northern door, go one (1) square west, then two (2) squares north, where a door will be on the western wall. This next room is a tad tricky because it "wraps" over from the left side to the right side of the map, this causes a bit of confusion as items will only be visible on one side or the other, but follow through these instructions to get all the available loot. Once through the door (should be facing west), ahead two (2) squares is a Tincture of Shadows, grab it and return to the square where the door the party first entered through. Go two (2) squares south and get the 3x Magic Nectar there, before going north four (4) squares, grabbing the 2x Golden Apples to the west, then another two (2) squares north. Turn west and advance two (2) squares, the game display may flick as the party passes from the left side of the map over to the right side. Get the 2x Granite Potions which will be here, then take one (1) more square west to the corner. Face south, and go eight (8) squares to the bottom corner, and collect the 3x Magic Nectar, before going north four (4) squares and turning west to face a door. Go through the door, turn south and proceed two (2) squares, face west and go six (6) squares forward. Two (2) squares south brings the party to another door on the western wall. Enter through this door and step into the mushroom ring (T3) located in a little alcove on the north-side of the room. The party will arrive at T3, facing south. Take one (1) square south, then turn either east or west (doesn't matter which), go one (1) square, then north two (2) squares, before turning the opposite direction to what was taken before, and go one (1) square to a find a door on the northern wall. (It's the only door out, so no chance of getting lost really). On occasions, would come across 2x Anthracite Golems in this room. Once through the door, one (1) more square will bring the party to a junction, with corridors going east and west, plus a door on the northern wall. If you want to skip this section, simply face east, go to the end of the corridor, through the door, turn right and all the way south until you see the mushroom ring (T5) and jump the next four (4) paragraphs. On the other hand, this walkthrough will cover everything in this section and earn the party a set of +2 Plate Mail (could be handy for your Fighter-types) and a powerful powder. Turn east and go three (3) squares before facing south and going four (4) squares to a door. Go through the door, there is some hidden Pandemonium Powder to be found in here. Exit through the same door the party came in through (only that door here anyway), go north for four (4) squares, turn east and forward one (1) square to the door. Upon entering through the door, face north and proceed two (2) squares to the corner, before turning west and going three (3) squares. There is a door on the southern wall, go through that door into a single square room. There is a Plate Mail +2 (U) hidden here. Grab it, then proceed through the southern door. Face west again, and go two (2) squares to where a door is on the northern wall. Going through that door, is another single square room, this time the Plate Mail +2 (L) is hidden in it. After collecting it, go on through the northern door, face west once more and advance one (1) square to the door. Enter through the western door, and exit the door in the middle of the southern wall. Take care not to step into the mushroom ring (T4) in the north-west corner of the room, or the party will be teleported right back to the starting position. Once through the southern door, face east and go seven (7) squares forward, then through the door, before turning south and going two (2) squares. Step into the mushroom ring (T5) located to the west. The party will arrive in a single square room at T5 facing north, just stand still for a moment. Each wall has a door into another single square room, the north and south rooms are of no interest (the southern room simply teleports the party to the northern room, yawn!). The eastern room contains one of the mushroom ring exits (there are a two exits from this dungeon), do that if desired. To press on with the exploring and looting, enter the western room, and step into the mushroom ring (T7). The party arrive facing east at T7. If you want to skip this section, the shortcut is to take one (1) square forward, and then five (5) squares north, then jump three (3) paragraphs in this walkthrough. Otherwise, there are five 2x2 square rooms to be explored, and some treasures to be got and monsters to vanquish. At the teleport starting point (T7), go one (1) square east, then three (3) squares south and enter through the door on the eastern wall. An Enchanted Mace and Plague Axe are hidden in this room. Get them and then exit the same door entered through. Proceed two (2) squares north, and enter the door on the eastern wall. In this room are 3x Coal Golems to be dealt with. That done, exit out the same door, go north another two (2) squares. Through the door on the eastern wall, and in this room are 4x Death Stars and 15x Ta-Li Stones. Exit this room, go two (2) squares north, and through the door on the eastern wall. This room was empty every time my party entered, so northing to do here, simply exit back through the same door entered. Face north, proceed two (2) squares before turning east to reach the final 2x2 square room. Once through the door on the eastern wall, turn north and advance one (1) square where a second door on the western door is located. (Had a little trouble with what might have been an invisible wall in this room, but could never quite work it out, found the best way was to go one (1) square east before going north, then one (1) square back west). Exit through the door and proceed one (1) square west and step into the mushroom ring (T8). The party will arrive at T8, facing north. This room is a big spiral, just exit out the door on the eastern wall and follow the spiral around until the end where the party will be facing a door on the southern wall. There is a Hoarder Slime lurking about, so take it out however your party wish. Exit through the south wall door, turn west and go forward one (1) square and face north. Some 3x Coal Golems are here. Proceed four (4) squares north, then through the door on the western wall followed by one (1) square west, and through the door on the northern wall. In this single square room, turn west and enter though the door. Inside this room is a Cleaver (can be used for a custom item made by Antone in Arnika) and some 19x Hunter Quarrels. Backtrack out of this room (exit the only door on the eastern wall, turn south, go through the door, then go one (1) square east), turn south and proceed two (2) squares. Enter through the door to the west and walk five (5) squares to the end of the corridor. Face north and go on through the door on the north wall (twice), to enter a room with a mushroom ring (T3) in the north-east corner. Do not step into it, or the party are taken back to where the +2 Plate Mail was, instead backtrack out of the room (southern door - twice, five (5) squares east and through the door at the end). Face south and go two (2) squares before turning west and going seven (7) squares to the end of the corridor. Go through the door on the northern wall, one (1) square west, then through the next two (2) northern wall doors. In this room is a Flying Snake, a Spiked Spear and a Filcher's Band. To get out, the party need to backtrack again (through the door on the southern wall (twice), one (1) square east and through the door on the south wall). Face east and proceed nine (9) squares to the end of this corridor. Turn south and go one (1) square before facing east and entering though the door on the wall there. In this room are some flying blood suckers, namely 4x Tiger Mosquitos and 6x Tse Tse Flies. Once dispatched, search for the 16x Mystic Arrows hidden here. Exit the room via the door on the southern wall. Exit the next room via the door on the western wall. Turn to the south, proceed six (6) squares to the corner, then face east. Ahead, there is a floor trap, however it can be avoided. Go two (2) squares east, then turn south and go through the door. There are 3x Resurrection Powders hidden one (1) square east, after grabbing them, proceed one (1) more square east, before turning north and going though the door. Face east once again and go forward two (2) squares. Turn north and advance eight (8) squares to the end of the corridor. Enter a room through the door on the western side and exit via the door on the southern wall (yes this is the same room that had all those mosquitoes before). Exit this next room via the door on the eastern wall, go one (1) square south, and in through the door on the western wall. Proceed four (4) squares to the end of the corridor, then face south and enter through the door. Some 2x Rapax Ghosts attack the party. After teaching them a lesson (how do you kill a dead monster's ghost anyway?!), exit out the door on the southern wall. Face west and advance four (4) squares and out the door. Go three (3) squares north and turn west, behind the door is the other mushroom ring which will teleport the party out of the dungeon. |
| Written by: Wolfie (comments to wizardry8@mail.com). Monster and item details are sourced from Flamestryke's Wizardry 8 Web Site Last Update: March 21, 2004. |
||